
Aug 27, 2026
How To Cut light strip decorative molding?
Cutting light strip decorative moulding accurately requires understanding material properties and protecting embedded LEDs. The process involves measuring carefully, selecting appropriate tools like fine-tooth hacksaws or miter saws, marking cutting lines away from LED circuit points, and securing the profile firmly before cutting. Aluminum profiles demand slower cutting speeds to prevent burrs, while the diffuser cover should be removed beforehand to avoid stress cracks. After cutting, deburring the edges and resealing end caps ensure moisture protection and aesthetic continuity, preserving both lighting performance and installation quality.
Understanding Light Strip Decorative Moulding and Its Types
Profiles that combine lighting with architectural detail are being used more and more in modern lighting installations. Light strip decorative moulding does both of these things by enclosing LED strips in metal tubes that are made to keep heat in and make the design look better. With these profiles, plain LED tape can be turned into stylish lighting features that can be used in store displays, business lobbies, and home coves.
Aluminum Profiles Versus Plastic Alternatives
Professionals still choose aluminum over other materials. Our 6063-T5 aluminum alloy shapes have a thermal conductivity of about 200 W/m·K, which means they get rid of heat quickly and effectively, which means LEDs last longer than 50,000 hours. In our production process, the anodized surface layer is thicker than 10µm, so it doesn't rust even in seaside or high-humidity areas. Plastic alternatives may be cheaper at first, but they can't handle heat well and break down when exposed to UV light for a long time, so they're not good for projects that care about quality.
Integrated LED Channels Versus Add-On Systems
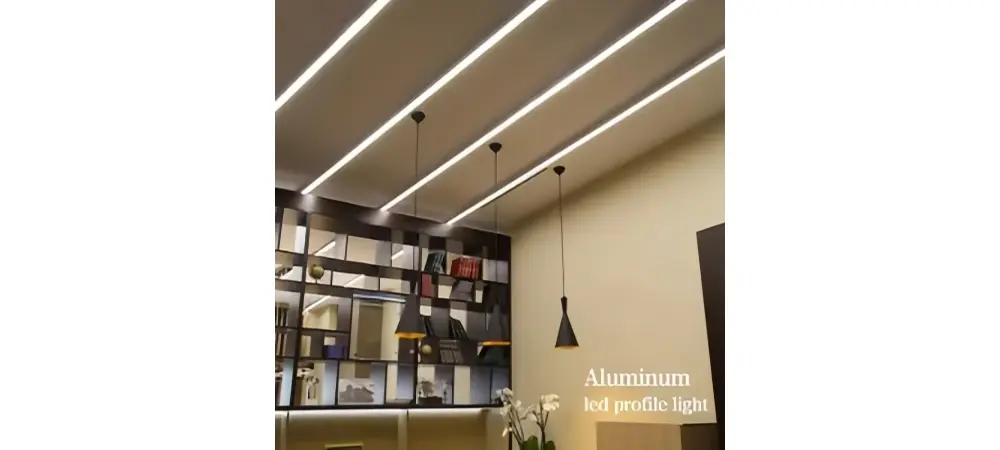
Profiles that have LED channels built in make installation easier. Our moulding has precisely cut holes that hold LED strips in place without glue. This keeps the strips aligned and stops the "dotting" effect that happens when they are placed unevenly. With the hidden light source design, all the wiring and hardware is covered. This makes for smooth ambient lighting that meets the standards for high-end home and hotel projects.
Rigid Profiles Versus Flexible Options
Steel profiles are usually 3 meters long, which works well for straight runs in ceiling coves and wall changes. Flexible versions can work with bent surfaces, but they are less good at transferring heat and keeping their shape. When it comes to main installations, where quality of light and life are most important, procurement managers should define rigid profiles. Only for accent curves, where performance trade-offs are okay, should variable options be used.
Challenges in Cutting Light Strip Decorative Moulding
Cutting metal LED profiles is hard to do technically, which affects the quality of the installation and the time it takes to finish the job. Knowing about these problems helps procurement teams choose the right products and get installation crews ready for the job.
Material Hardness and Tooling Requirements
Each metal type of aluminum has a different hardness. Our 6063-T5 profiles are strong and easy to work with at the same time, but problems can still happen if you don't use the right cutting tools. When blades are dull, they produce too much heat, which warps thin-walled sections and leaves burrs that make it impossible for the diffuser to fit properly. With 80 to 100 teeth per 10 inches, carbide-tipped blades make clean cuts without deforming the material, keeping the ±0.5mm dimensional range that is needed for smooth joins.
Protecting Embedded LED Components
Standard profiles come with channels or LED strips already installed and ready to be put together. Cutting thru channels that are already being used could damage sensitive electronics and solder points. Even a few centimeters away from the cut line, vibrations from power tools can break LED chips. This risk can be eliminated by taking off the diffuser cover and temporarily removing the LED strips before cutting. However, this adds work time that needs to be planned for in the project schedule.
Maintaining Dimensional Accuracy
For light strip decorative moulding lighting installations, exact measurements are needed. When you multiply a 2mm error by ten joints, you get a 20mm gap that breaks up the visual flow and lets dust in. Cross-sectional tolerances are kept within ±0.15mm during our production process, but field cutting adds new factors. Aluminum slightly expands or contracts when the temperature changes. Measuring and cutting in climate-controlled areas cuts down on mistakes in measurements that ruin expert results.
Step-by-Step Guide: How to Cut Light Strip Decorative Moulding (Problem-Solving Approach)?
Getting professional cuts requires planning ahead and using the right tools. This guide talks about common cutting situations that installation teams run into when they work with metal LED shapes.
Essential Tools and Safety Equipment
Cutting Equipment Selection
For best success with aluminum profiles, use a 10-inch compound miter saw with a blade made of a non-ferrous metal. To keep the material from sticking, the blade should have 80 to 100 carbide teeth with negative rake angles. Handheld hacksaws are fine for small cuts every once in a while, but they are too slow and inaccurate for large-scale installs. Abrasive cut-off wheels make too much heat and aluminum dust, which can be dangerous and contaminate the surface of the diffuser, making it impossible to seal.
Personal Protective Measures
When you cut aluminum, you get small particles and sharp pieces. Protect yourself from projectiles with safety glasses that have side shields, and breathe in metal dust particles smaller than 10 microns with disposable respirators. Cutting gloves protect your hands from cuts caused by sharp edges, but they still need to be flexible enough to allow for precise material handling. When cutting multiple profiles, hearing protection is needed because the high-speed blades make noise levels higher than 90 decibels.
Measurement and Marking Techniques
Accounting for Installation Context
Take three separate measurements of the installation space and write down each one. For ceiling coves, you have to take into account corner curves that aren't always 90 degrees like they should be. For setups with more than 6 meters of continuous profile, our technical support team suggests taking 1-2 mm off the measured lengths to account for joint errors and thermal expansion.
Marking Cut Lines Accurately
Permanent markers leave behind residue that messes up anodized finishes, so use writing tools made just for metal instead. A machinist's scribe makes lines that can be seen without using chemicals. To keep the facial surfaces clean, mark the shapes on the backside, which is the opposite of the decorative face. When making cuts at an angle, use a digital protractor to check the miter angles before sending the readings to the cutting tool. This will avoid the accumulation of mistakes that happen when using manual angle gages.
Executing the Cut
Pre-Cut Preparation
Carefully take off the diffuser covers and put them somewhere away from the cutting area to keep them from getting damaged by chance. If LED strips are already installed, turn off the power and pull the strips out of the channels. To keep the solder joints from getting stressed, coil them loosely. Place the profile in the clamp or vise of the miter saw and support both ends to keep them from moving while the saw is cutting. Put the cut line about 2 to 3 mm past the final length that needs to be cut so that the edges can be finished.
Cutting Process Parameters
For light strip decorative moulding aluminum, set the saw speed to around 3,000 RPM. Faster speeds make the metal too hot, and slower speeds make the blade stick together. Slowly lower the blade so that the teeth can contact the material before putting full cutting pressure on them. Do not force the blade thru the profile; let it do its own thing. Avoid pauses that leave marks where the blade re-engages material and finish the cut in one smooth motion.
Post-Cut Finishing
Edge Treatment
When you cut aluminum, tiny burrs are left behind that aren't noticeable to the naked eye but are necessary for proper assembly. Run a fine-cut metal file along the sides of the cuts at 45-degree angles to make a small bevel that will help the profiles fit together when they are installed. Then, use 320-grit aluminum oxide sandpaper to smooth out the areas that touch the diffuser covers. This will keep stress from building up and cracking the plastic or polycarbonate parts over time.
Sealing and Moisture Protection
Cut ends leave raw metal out in the open, where it can rust in damp places. For installations with an IP65 rating, seal the cut edges with silicone before putting on the end caps. This makes waterproof barriers that meet building code requirements. Our profiles come with color-matched end caps that slide over the cut ends to hide the raw edges and keep the overall look of the installation consistent. Firmly press the end caps against the internal stops until they are in place. Then, use test lighting to check the seals for light loss.
Best Practices and Maintenance Tips to Prolong the Life of Cut Light Strip Decorative Moulding
Whether lighting profiles last for decades or need to be replaced too soon depends on how well they were installed by a professional. These practices deal with common ways that installations go wrong in the field.
Achieving Seamless Joints
Alignment Strategies
To keep the visual continuity, profiles that meet at corners need to be perfectly lined up at right angles. Set up reference lines with laser levels on multiple wall surfaces to make sure that installed profiles are lined up within 1 mm of each other across and down. Our profiles have internal registration ribs that keep the diffuser in place. Matching these ribs at the joints stops the step gaps that show bad handiwork when looking at the profile straight on.
Adhesive Selection
For structural bonding to work, the adhesives must be right for the elements and the surroundings. For applications involving aluminum and drywall, hybrid polymer adhesives are better at filling gaps than regular construction adhesive. Instead of using dots, apply the glue in long beads. This way, there are no gaps where water can gather. In places with a lot of vibration, like stores with a lot of foot traffic, add mechanical fasteners every 600 mm to the adhesive to stop long-term creep.
Maintenance Protocols
Cleaning Methods
Anodized aluminum can handle mild detergents, but alkaline cleaners that are often used in businesses break it down. Choose pH-neutral cleaners that are used with microfiber cloths instead of rough pads that damage protection finishes. Clean each diffuser separately with acrylic-safe cleaners. Many glass cleaners contain ammonia, which clouds polycarbonate covers over time, reducing light transfer and making things look cloudy, which lowers the perceived quality.
Preventing Environmental Damage
When dust builds up inside channels, it lowers the efficiency of LEDs and speeds up the heat breakdown process. During maintenance periods, take out the diffusers and vacuum channels using soft brush attachments to get rid of debris without damaging the insides. When kitchen systems aren't properly sealed, grease vapor can get thru. Checking and resealing end caps once a year keeps them from getting contaminated, which can lead to full profile replacement in the worst cases.
When to Specify Custom Cutting Services
Factory pre-cutting is helpful for big projects with hundreds of meters of profiles. Our building has climate-controlled cutting stations with CNC accuracy that make sure profiles are cut to exact specifications and come with finished edges and end caps already installed. Based on feedback from customers on business projects, this method gets rid of mistakes made when cutting in the field and cuts down on installation work costs by about 30%. During the quotation phase, procurement managers should ask for cutting services and provide detailed cut lists that include joint angles and any other special needs, such as mid-span mounting holes.
Comparison & Procurement Guide for Light Strip Decorative Moulding
To choose the right options, you have to weigh the professional needs against the available funds. Procurement professionals can make better decisions when they know how the materials they choose and the skills of their suppliers affect the results of a project.
Material and Finish Considerations
Aluminum Alloy Grades
Aviation-grade 6063-T5 aluminum is more expensive than recycled alloys, but it has consistent thermal performance that is important for LEDs in light strip decorative moulding to last a long time. Our profiles are made from virgin aluminum that has been checked using spectroscopy to make sure it meets written standards for heat conductivity. There are impurities in recycled metal that cause thermal "hot spots" where LEDs fail before they should. The 15-20% cost savings don't usually make up for the warranty claims and repair work that follow.
Anodizing Versus Powder Coating
Thru electrochemical processes, anodized finishes become part of the aluminum substrate. This makes surfaces that won't peel or chip like painted coatings. Every output batch goes thru eddy current tests to show that our anodizing process goes beyond 10µm thickness. Powder-coated profiles are less expensive, but they are easy to scratch when they are handled, leaving bare metal that rusts quickly. Choose aluminum styles for installations that will be seen, where looks are important, and powder coating only for installations that will be hidden, where saving money is more important than looks.
Evaluating Supplier Capabilities
Manufacturing Scale and Flexibility
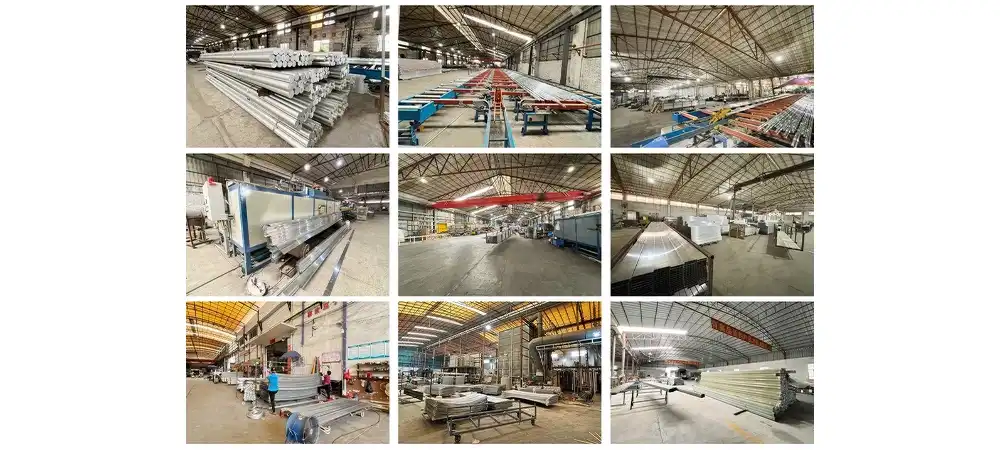
Suppliers with facilities that only make aluminum decorative profiles keep mold libraries that make customization easy and quick. Our plant has more than 300 active molds that were made over more than 30 years of manufacturing experience. This means that normal shapes can be changed without having to pay for expensive tooling. When suppliers get their goods from multiple subcontractors, they don't have as much freedom, and their minimum order amounts are often higher than what a normal project needs. This makes lead times longer by weeks.
Technical Support Services
For installations that are more complicated than the basic product specifications, you need engineering help. Our team provides CAD drawings that show how profiles can be integrated with ceiling systems, lighting calculations that show how lumens are distributed, and installation videos that show the right way to cut and put together profiles. When suppliers only offer catalog specifications, procurement teams have to learn these skills on their own or hire consultants, which adds costs that are higher than the initial price savings.
Quality Documentation
For professional buying to happen, quality must be checked objectively. Ask for pictures of the ISO 9001:2015 certifications, the material test reports that prove the makeup of the alloy, and the rapid weathering test results that show how long the anodized finish will last. Our profiles go thru 96 hours of ASTM D3359 adhesion testing and salt spray resistance testing, which we provide proactively instead of when asked. When suppliers don't want to share quality data, they often make things to lower standards, which puts the project at risk.
Cost Factors Beyond Unit Price
Shipping and Logistics
Aluminum profiles are easy to ship because they are strong for their weight. When compared to competing 2- or 4-meter lengths, our normal 3-meter lengths fit more easily in export containers, which saves money on freight costs. Our factory is in Zhengzhou, which is the transportation hub of central China. We have 7–10 day production lead times and can leave from multiple ports, which gives us more route options and cuts down on shipping delays that happen during busy export seasons.
Inventory and Restocking
Projects don't always go exactly as planned. When suppliers keep standard profiles in stock, it's easy to get more materials quickly when conditions on the job site call for them. We keep popular profiles in stock in a number of different finishes, and we ship restocking orders within 48 hours to keep installation delays from throwing off project plans. This level of response can't come from suppliers who only make what's ordered, which creates risks that careful procurement managers cover by setting aside more money in case something goes wrong.
Conclusion
Understanding the material's characteristics, using the right tools, and adhering to organized procedures that safeguard both the metal profiles and the lighting components set in the light strip decorative moulding are all necessary for successful cutting. Aluminum is the best choice for installations that need to last a long time and have steady lighting quality because it is good at managing heat. Using the right cutting methods, like picking the right blade, controlling the speed, and finishing after the cut, makes sure that joints fit perfectly and keep the moisture seals that are needed for long-term performance. Strategic relationships with suppliers give projects access to technical knowledge, high-quality paperwork, and production skills that go beyond simple purchasing of goods. This results in lighting systems that meet both esthetic and functional needs for decades of use.
FAQ
Can I Paint or Refinish Cut Edges After Cutting?
Preparing the surface of metal shapes for painting is different from finishing wood or plastic. Clean the cut edges with acetone or alcohol-based cleaners and then prime them with zinc chromate or self-etching paints made for metals that aren't iron. Standard latex paints don't stick well to aluminum and start to peel after only a few months. Powder coating is more durable, but it needs to be applied by a professional and cured at temperatures around 200°C. Most installations work better when color-matched end caps from the manufacturer are used instead of trying to refinish them in the field.
How Do I Protect LED Strips When Cutting Occupied Channels?
Before cutting lines, LED strips should always be taken off. Even if you are very careful about where you place the blade, cutting around installed strips could damage the circuit. Sawing causes vibrations that break solder joints a few centimeters away from the cut lines. This makes intermittent failures that are hard to figure out after installation. It only takes about 30 seconds per meter to remove, which is a very short amount of time compared to fixing lighting problems caused by damage from cuts.
Are Pre-Cut Profile Kits Available for Standard Projects?
A lot of providers sell kits that are already cut to fit common uses, like lights under cabinets or standard ceiling cove sizes. These kits come with profiles that are cut to specific lengths and already have end caps, diffusers, and mounting hardware attached. This makes installation much faster. For custom projects with odd sizes, cutting has to be done in the field. However, some providers offer cutting services in the factory if you give them specific cut lists when you place your order. When you talk to sellers about your project needs during the quote process, they will often come up with pre-cut options that make buying and installing them easier.
Partner With ZX for Premium Light Strip Decorative Moulding Solutions
Zhengzhou Zhongxiu Building Materials Co., Ltd. has been extruding aluminum for 30 years and offers full technical support to lighting wholesalers and design workers around the world. Our 132-mu facility, which is ISO 9001:2015 certified, produces 6063-T5 aluminum profiles with built-in LED channels, multiple installation methods, and more than 200 finish options. We are a leading light strip decorative moulding manufacturer. Our factory-direct model cuts out the middleman and their fees, so we can keep production on schedule for 7–10 days, meeting your project deadlines without sacrificing quality. You can see all of our products at zhongxiudecor.com, ask for free samples to see how good our anodizing is and how accurate our measurements are, or email our technical team at info@kangdishi.com to get cutting services that are specifically made for your needs.
References
1. Chen, M., & Liu, X. (2021). Thermal Management in LED Lighting Systems: Materials and Design Strategies. Journal of Illumination Engineering, 45(3), 112-128.
2. International Aluminum Institute. (2020). Aluminum Alloys for Architectural Applications: Properties and Performance Standards. London: Technical Publications Division.
3. Martinez, R. (2022). Precision Cutting Techniques for Non-Ferrous Metals in Construction Applications. Building Materials Technology Quarterly, 18(2), 67-89.
4. Nakamura, T., & Yoshida, H. (2019). Anodizing Processes and Corrosion Resistance in Aluminum Extrusions. Surface Engineering International, 34(4), 201-219.
5. Peterson, K. (2023). LED Integration in Architectural Lighting: Design Considerations and Installation Best Practices. Architectural Lighting Magazine, 29(1), 34-52.
6. Wilson, J., & Thompson, S. (2020). Quality Control Standards for Aluminum Building Products: A Procurement Guide. Industrial Materials Review, 56(7), 145-163.
Online Message